
IMPORTANT UPDATE! Skip the the first several steps of making the paper circles yourself and order perfect paper circles at www.paperpieces.com .
HERE IS THE OLD WAY incase you want to try it.
HERE IS THE OLD WAY incase you want to try it.

First I gather together circle making items. The green plastic templates are great, but I've used spools or anything that is perfectly round.

Using a mechanical pencil, I draw the circles on light card stock. I pull these out of magazines - free is always good ;)

I use kids scissors for cutting them out. The thicker blades make good edges. One hint, move the paper, not your scissors, it really does work.

I cut out several thicknesses of fabric at a time. I eyeball a scant 1/4 inch around the paper rounds.

I sew a running stitch around the circle.

I insert the paper circle and cinch it evenly around. I bring my thread up on the the right side of the fabric and knot off. This helps me not loose tension at the end.

In no time at all, you have a nice pile of perfect little berries. The next step is to press and starch them. This is what I like:

I keep the papers in my berries until I sew them on my project. When I'm ready, I pop out the paper (you can pinch it or fold it because these are "one use" papers) and pin or baste them down.
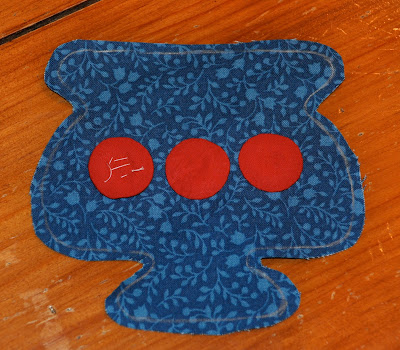
Here is one that is basted and two that are sewn on.
I love adding berries and cherries to quilts, they are whimsical and fun!
avandia lawsuit