Friday, November 26, 2010

Flat It Where's It's At

Hello - I hope everyone (in the US) had a wonderful Thanksgiving. I've been bitten this week with a flu bug, but feeling a little better finally and I'm grateful for all the help I had yesterday and that it was a quiet family day.

I even manged to set the table between rests on the couch.  It is my husbands tradition to sing "We Gather Together" before dinner.  We hold hands and sing with joy, if not skill.


Coco knew something was up with the fancy placemat.  She took up a post at her food bowl to see what would happen.  She enjoyed her first Thanksgiving turkey and gravy.


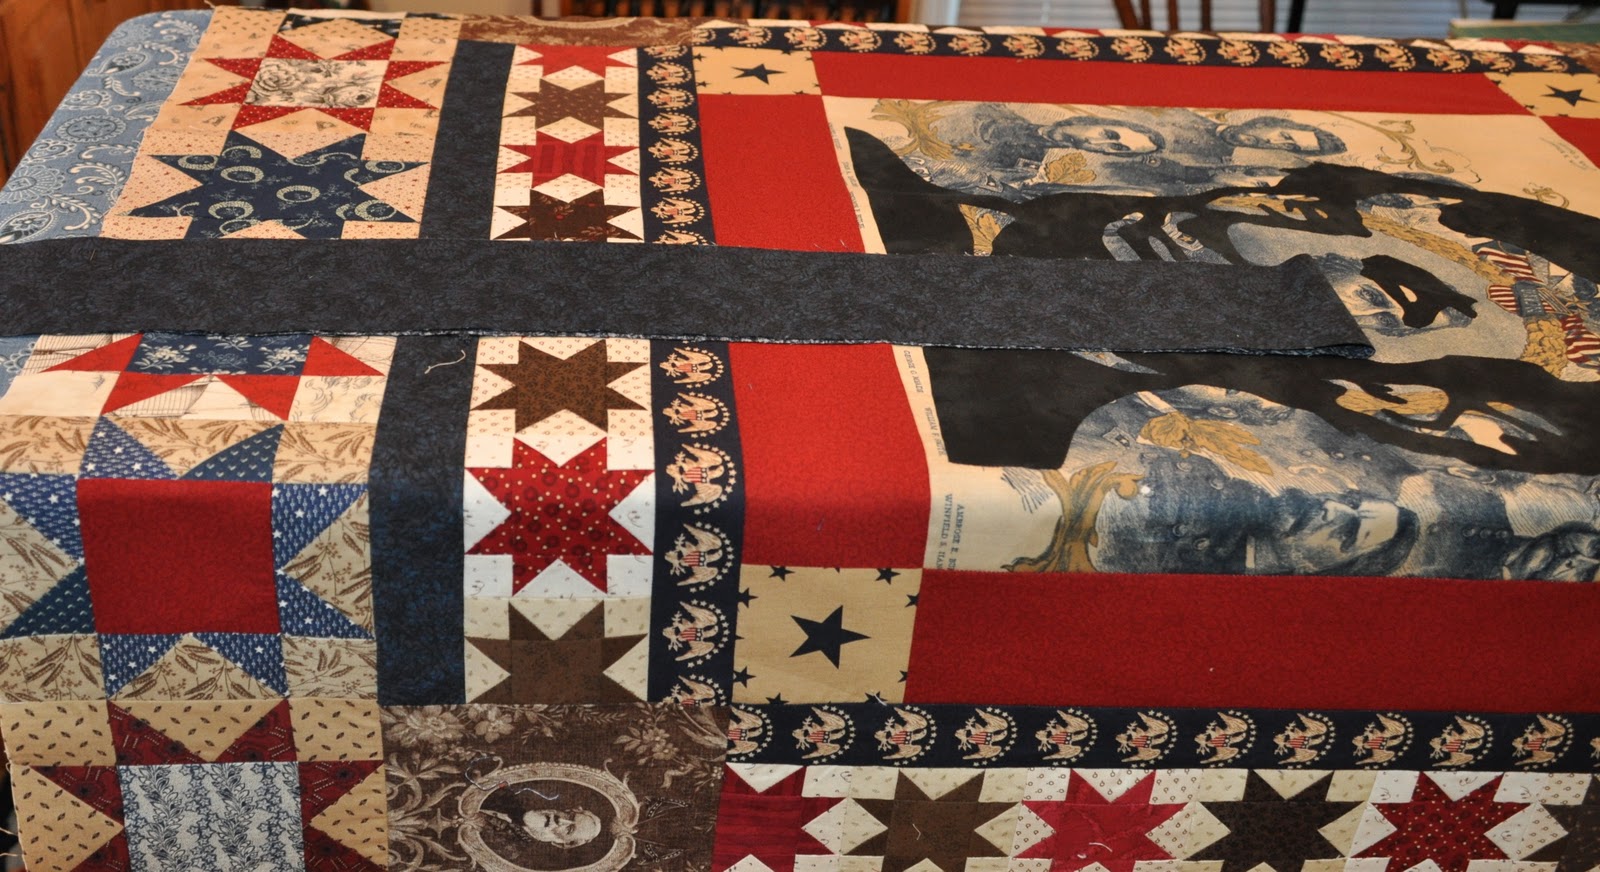
My quilting goal today is to get the last three borders on the raffle quilt.  I put the first one on and attached more leaves to it on Wednesday.

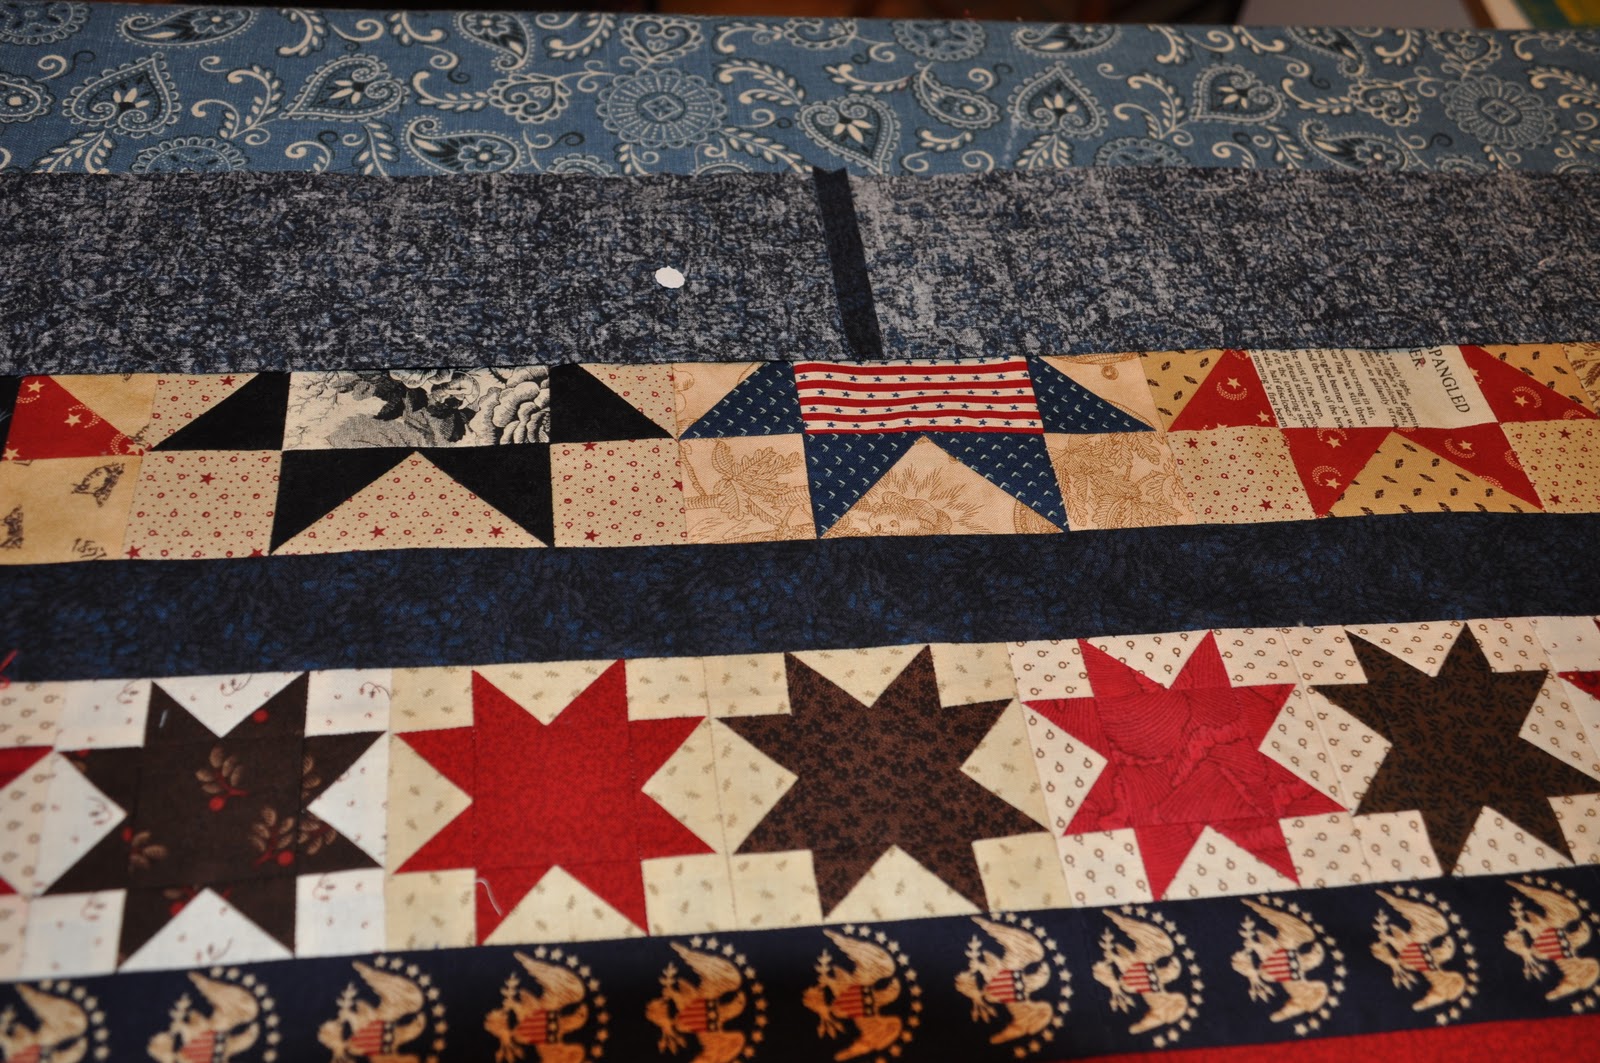
One thing I have learned from helping quilt judges is that they really want to see a nice flat, square quilt.  I used to just "wing it" and have had poor results.  There are many ways to add borders.  I developed this way of doing it and really works well for me.

I work on my "big board" ironing board, but any large flat surface will work fine.  I used "Abe" as my sample.

Step 1-
Layout the quilt right side up and find the center of the quilt.  Mark it with a pin, or a dot.


Step 2-
Find the center of the border and mark it with a pin.


Step 3-
Place a pin (through the border fabric only) at the center and at each end of the quilt.


I never trim any border extra off until it is sewn and pressed and squared up.


Step 4-
Pick up the border piece and re-pin the end pins to the edge of the quilt top (ride sides together) and pin the center point.


Step 5-
At this point I flipped it over and smoothed it and pinned from the pieced side.  Pin the dickens out of it easing where necessary - never move the center or end pins.  easing, pinning, sewing and pressing will work - trust.


Step 6-
Carefully lift it all and proceed to the machine.  I sometimes use a seam ripper as a stiletto to feed the seams in the right way.


Step 7-
Press carefully.  I like a lot of steam, but do what works for you.


Step 8 (final)-
Square up the corner.  I use my small mat and square ruler for this.


One of the reasons I like this method over just measuring and cutting is that I can "see" everything that is happening.  I also leave my border length intact until all is well, then I trim it off.

So I'm off to make a cup of tea and go to work - wish me luck.  I hope if you are not shopping, that you enjoy some quilting time today.

Tuesday, November 16, 2010

Busy, Busy, Busy.....

Good Morning!
This Autumn I've been using a doll quilt that I made my daughter for Christmas 2002.  I made it for her Kaya doll, an American Girl doll.  I really like the scrappiness combined with the solid background.  This is one of those doll quilts that would make a nice full sized quilt too.


Back


Hooray, I finished my first mini-auction quilt.  I quilted it with silk thread.


The back.  Aren't these dancers joyful?


On Saturday, my guild had a member sew day.  It was great.  Susan made homemade pralines and we had salad and pizza and my chocolate cherry cake.  I spent about an hour on non-raffle quilt work to set a few of the 9-patches from Julie's recent swap.  I am going to use 3 different setting square fabrics.  This will eventually by our new "king sized" bed quilt; my first king.  Did I say eventually?


Raffle update.  Can you believe all the blocks are here and accounted for?  In only 1 month.  What a wonderful and speedy job these women did - bravo!   (This is not the final arrangement, just added them as I received them for counting purposes.)


These are the borders I designed.  Thanks to Susan, Pauline and Elizabeth we have them ready to add to the body of the quilt.


I need about one hundred 4 patches for the second border.  Thanks to the sew day, they are done.  Now to string them together.....


And finally, a little coco.  She is exhausted.  She has decided that dog beds, which I've purchased 2 of are not necessary when there are couches around.


In an effort to avoid the paparazzi she has turned away from me.  What a stinker!


Whew!  I've been busy.  And so have all my blog friends, I'm still catching up on my reading!

Wednesday, November 10, 2010

Back to the Muggle World

We aparated back to the Muggle world after a wonderful time at the Harry Potter theme park at Universal Studios.

I thought I'd take this opportunity to share the HP quilt that I made Hanna a few years ago.  It was not easy to find HP fabric at the time, but between ebay and a few friends, I managed to get enough for a quilt and two pillow cases.  It was a real trick of magic to keep this a secret for her Birthday.

I pieced it together out of many of the HP fabrics, and used the lightening streak (Harry's scar) as borders.


There is a panel on the front and back, thanks to ebay.


The pillow cases have only a little official HP fabric on the side, but the batik stars worked well here, I think.


Here are a few photos from our wonderful trip.  Does this young lady look happy and excited, or what?


The architecture of the buildings and castle and plantings were really well done!


I even managed to find sewing in the wizarding world at the robe shop.  The tape measure moved up and down at different lengths by magic*

Hagrids hut, very cool.


The buildings of Hogsmeade were snow topped, just as in the movie. 


Everything we had heard about the Butter Beer was true; it was delicious!  I sampled the special Hog Heads Beer, which is only available here in Hogsmeade, it was quite satisfying with my shepherds pie.


And now back to the Muggle world.  I sure wish I could wave a wand and finish all my housework so I can back to quilting!

Tuesday, November 2, 2010

Día de los Muertos

Greetings!

This is a small quilt that I made to celebrate the "Day of the Dead". While it is not for everyone, I love the idea of celebrating the Day of the Dead. Many of the dearest people in my life have "passed over" and I think a day to celebrate them with flowers, food and music is terrific.

I titled it "I See Dead People -  Ode' to Frida Khalo"


I used variegated thread and did a liberated cross-hatch (very liberated)


The back shows a larger piece of the fabric I used.


Here are some miniature pieces of art that I have collected.  This is a rock band that I found for my son.


My favorite Mexican artists, Diego Rivera and Frida Khalo


I love this one, it's a banquet with Frida's portrait on the back - so cool!

A view through the top


This photo will give you a better idea of the small scale of these pieces.


Here is a piece of "sugar head' mexican candy fabric that I love.  It's hard to see but there is a lot of colorful sparkly parts on it.  I think it would be a great backing from something someday.


Here in NJ the school kids have a few days off, so my daughter and I are off to the Wizarding World of Harry Potter for a few days.

Have a great week and remember to Celebrate today!