Wednesday, November 20, 2019

Challenge Accepted!

Here is the big reveal of the word challenge quilts my small sewing group created.  We had such a fun time making these.

My word is Bee.  Can you guess what each block represents?  Click the photo to see my baby bead embellishments.
We each picked a word and made 9 blocks to depict the word. We connected the blocks with the pot holder method.  

Thank you Wendy Reed of Constant Quilter who has a great tutorial.  Wendy makes incredible award winning quilts with this method.  She has a wonderful blog that always inspires me.

Norma's word is Cat~
Pauline's word is Eye.
Nancy' word is Time.
Fun, right?  what word would you use?  

Special thank you to Pauline for making our story cards.  They are just great.

Whig Rose Update:
Hooray!  I finished my last block.  I am setting them with a zillion HST.
Thank goodness for Triangles on a Roll.  They come perfect with no trimming.  Extra steps on the front end for great results on the back end are worth it for me.
I can't decide if I like them radiating, or going all the same way.  What do you think?  It's hard for me to be impartial when I see it so often.
I get a lot questions about adding lettering to my quilts.  I use Microsoft Word and print out the letters on the computer.  I enlarge them to about 350%.  

I also like to make plastic templates because it makes marking them easy and more accurate.  I don't mind extra steps that produce excellent results.
A Cooper Hawk came for a visit and we had a great view out the kitchen window.  
Have a Great Day!  
xo

Wednesday, November 13, 2019

Celebration of Quilts!

Oh My!  Song of the Sparrow won the favor of the judges at the recent Brownstone Quilt Show this past weekend.
My quilt was awarded with 1st in Applique Wall Quilts, Best Hand Quilting and Best in Show.  I am so honored and still amazed.

The show was excellent and the quality of the quilts was the highest it has ever been.

I was very preoccupied chatting with friends and guild members so I didn't get all the photos that I would have liked but here are some of my favorite quilts:

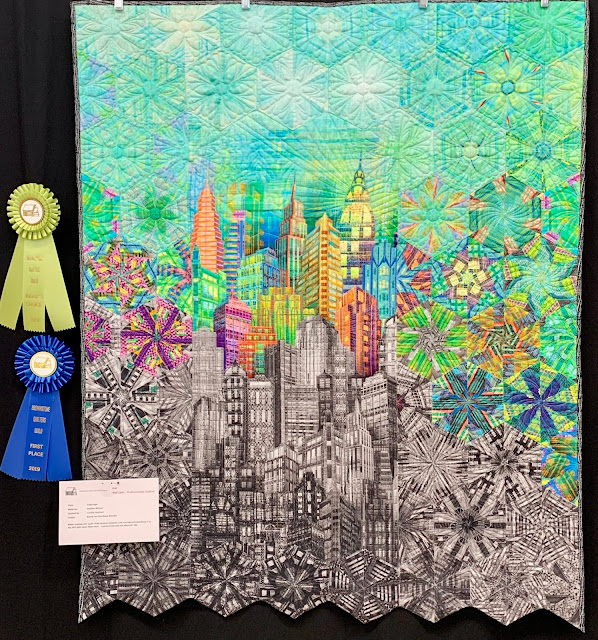
Pauline's City Scape One Block Wonder - and what a wonder it is!  She was awarded 1st place duet wall quilt, Judged Choice and Viewer's Choice (awarded after photo).
Nancy's (co-chair) BOM Star Quilt.  Machine quilted with my fan stencil.
Pauline's Star (BOM co-chair)  Such an incredible setting!
Another Star BOM Beauty by Peggy.
Norma's Baby Quilt with embroidery animals.
Incredible recreation of a 1916 Quilt that was a feature quilt and book cover of the Red and White Infinity Variety Show in NYC.
Fun hexie quilt by Margaret.  The title is "never again".
Lovely 4 Block Applique' by Maureen.
I was absolutely smitten with this pattern.  So charming! and so well done.
Love those Hand Quilted Baptist Fans!
 Each Pair carried a "ticket to ride".  Adorable!
Nine-patch color wave quilt by Jacqueline 
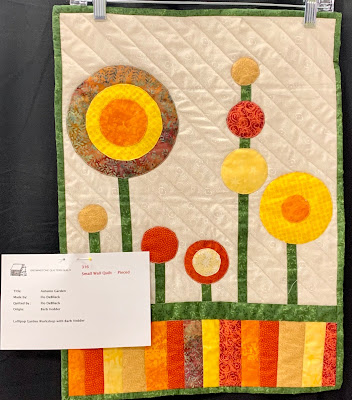
Finished Lollipop workshop piece made by Flo.  Love the colors!  Flo won the raffle quilt on Saturday - yay
 Margarets Harry Potter Quilt.  As a inept paper piecer I am impressed!
Action shot of my God Jul quilt going up.  Thanks you Sir!
My Toile' the Night Before Christmas.
 You can see more on the Brownstone Facebook Page Here.

My Silly Vanna White Impression - Have to get it while the gettings good, right?  ha ha
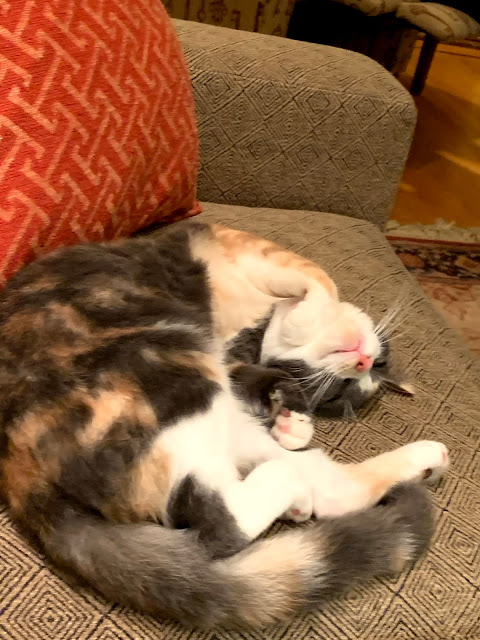
 Nutmeg is totally unimpressed and just wants a belly rub :)
coco says "lady: hurry up and put my fleece on the sofa, it's cold here CT."
Congratulations to all members of the Brownstone Quilt Guild on a Fabulous Celebration of Quilts, and especially my friends, Pauline and Nancy for Co-Chairing this wonderful event.

xo

Wednesday, November 6, 2019

Oh My Stars Swap Tutorial

Both Groups are FILLED    Repro: 40   Modern:  31

Hello Fun Swappers!  Here we go!

Basic Information:
  1. Each Block will finish at 6" (6 1/2" unfinished)
  2. You will make 1 block for each swapper in your group:
    • Repro:     40 Blocks
    • Modern:  30 Blocks
Repro Group
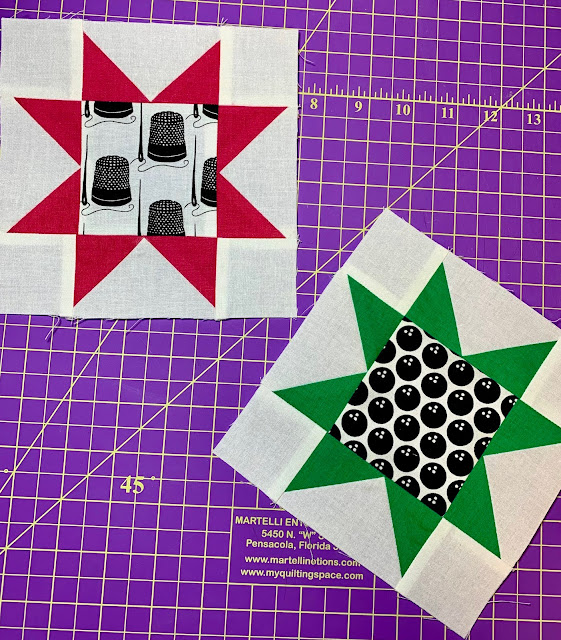
You are using good quality unbleached muslin fabric for the background, and either 1 or 2 reproduction prints for the stars  (see the photo above)

Modern Group:
You are using white for background.  I like Moda Bella white but any good quality white is fine.  (NO tone on tones or grunge)  Use a Black and White Print for the center and a solid bright for the star points. (see photo below)

Basic Rules:
  1. Use Only Good Quality Quilt Shop Fabric
  2. Use your very best sewing skills
  3. NO TRIMMING, when you trim you lose points
  4. Mail them back ON TIME - January 11, 2020
NOTE:  I used the modern fabrics for the tutorial, but of course you'll use what every fabrics are called for in your swap group.

Here are the pieces you need to cut for each block:
4 - 2" squares of background (muslin for repro, white for modern)
1 - 3 1/2" square for the center 
4 - 3 1/2" x 2" Flying Geese Units

To Make the Flying Geese Units:

(TEST ONE BLOCK FOR SIZE FIRST)!

The cutting instructions are:

4 - 2 3/8" squares for the star point fabric
1 - 4 3/8" Square from the background fabric
Mark diagonal lines on the small squares from corner to corner and lay them (right sides together) on the larger square.
Here I used a simple lead mechanical pencil.
 Here I used the sewline white ceramic pencil
I do at least two sets at a time, more if I have them prepped.   If you want to use pins, I pin way to the side so I can't hit them with my needle.
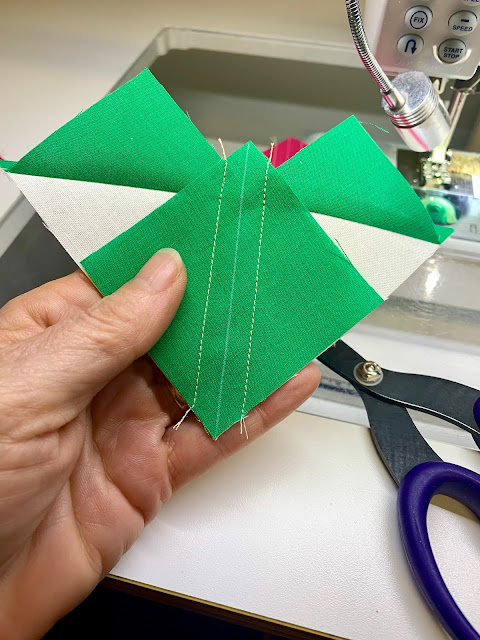
 Sew an accurate 1/4" seam away from both sides of the drawn line.
 Now using you scissors or a rotary cutter cut through the drawn line.
Finger press, then press with a hot (dry) iron toward the small half squares.

I do like to use a little starch on piecing to keep things nice and straight.
 Now place another small square on the background of the unit and sew 1/4" seam on both sides of the drawn line.
 Cut on the line and press
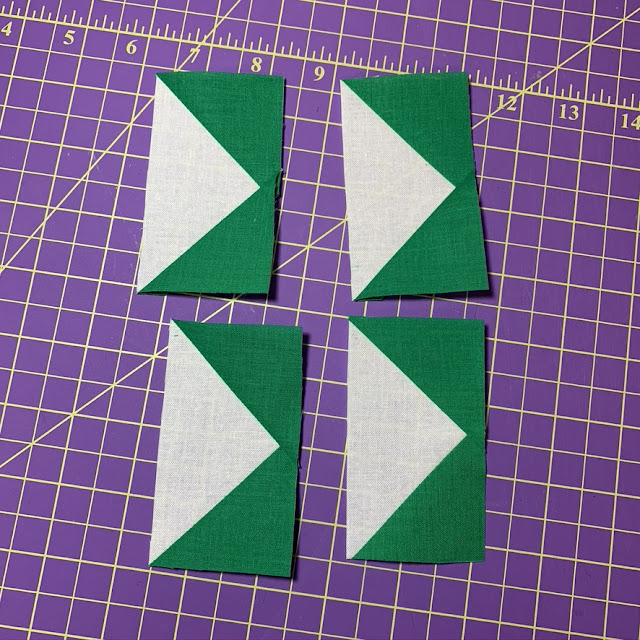
And here you have your flying geese units.

TRIM THE DOG EARS AND DOUBLE CHECK THE SIZE TO BE SURE IT MEASURES  3 1/2" x 2"
 *****Special Report - when I used these measurements, my block did not come out quite the right size.  It was close but I knew it could be better***
So here are the Revised sizes I used:

4 - 2 1/2" squares for the points
1 - 4 3/8" square for the background
If you use the revised size, you will probably have to trim a little.  Please use a good ruler with clear lines and be sure you have a 1/4" seam allowance on this side of the unit.  See below↓↓
Trim the dog ears
and check your finished trimmed unit - 3 1/2" x 2".

Layout out the block and sew into 3 horizontal rows.
Press well.  Here is how it should look on the back:
Join the rows to complete the block
The back will look like this before pressing. 
Press the last 2 seams OPEN so the block lays flat.
It will look like this (you can see that I very carefully graded the seam by carefully trimming the green fabric so it won't show through to the front.)
Viola!
Please note that I have a 1/4" seam allowance on all star points - YAY


If you have any questions, go back to the top and read all the way through or print out the entire tutorial to use in the sewing room.

If you still have a question, leave a comment here or email me.

Thank you so much for signing up to swap.  I have sent an email to all swappers, if  you didn't receive one, check your junk mail and spam and email me right away.

Happy Sewing
xo