Tuesday, January 29, 2013

Pin Basting - A Cautionary Tale


Thank you for all your get well wishes!  I feel much better.  Funny, well enough to quilt, but not nearly well enough for housework.

Fabric APB!!
Julie is looking for a red fabric and I know how she is feeling.  Without the help of generous quilters I never could have finished my Mothers Garden quilt.   Please pop over to her post and see if you can help her.
http://quiltjewelry.blogspot.com/2013/01/that-red-fabric.html

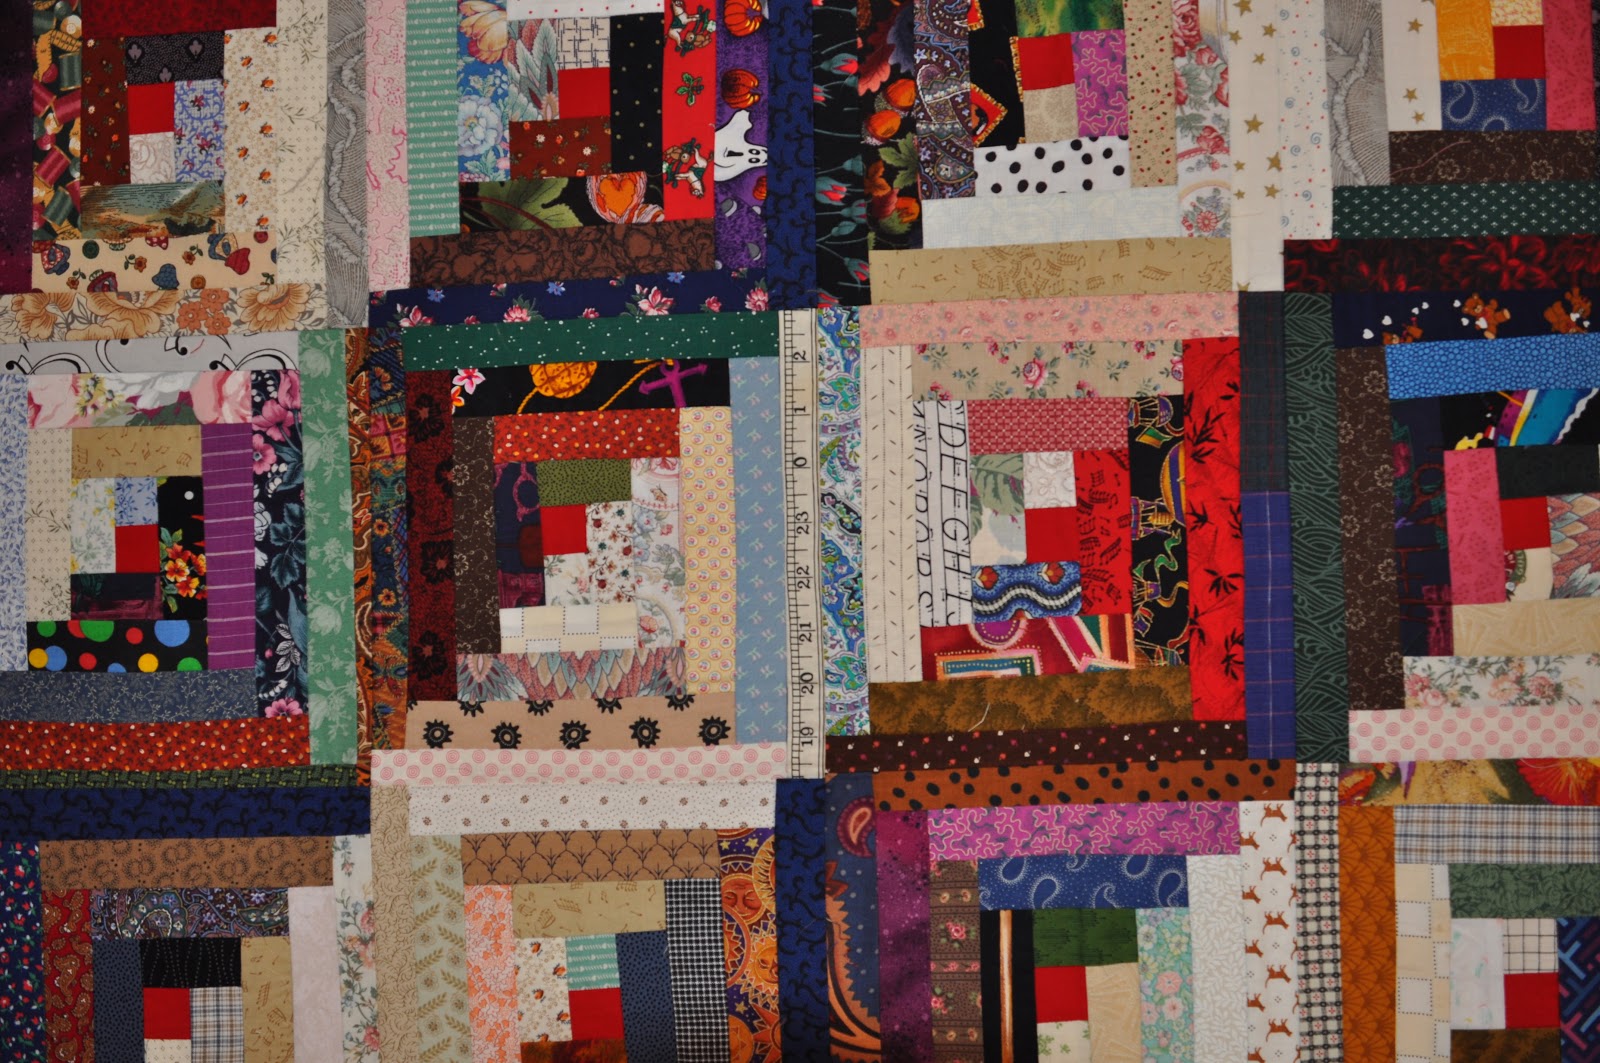
On Sunday coco assisted me in the sewing room while I finished the Log Cabin top.  What a nice pup.


Today was quilt basting day.  I decided to offer step by step of how I pin baste on my table.  This method can be used with any sized table, even a card table.  A folded banquet table works well or you can make a table with plywood and 2 upturned trash barrels.

Line the surface with cutting mats.  I cut a really old one for the small spaces.


Fold each layer in half and half again to find the center.  Mark with a safety pin.


Lay the backing face down, centering the pin with the center of the table.


Using extra large binder clips, secure the backing to table.  Be careful not to stretch the fabric too much.   Also try and keep the fabric grain straight in both directions.  If you have a pieced back it is a good idea to secure those areas.


I like to let the batting "rest" out of the package for a day or so.  Here is coco helping it to relax.  Good girl.


Smooth the batting over the backing careful not to stretch or pull it.  Match the center pins on the backing and batting - and don't forget to remove the one from the backing so it's not quilted in.  (I used an old photo here, cause I forgot to take one this morning)


Last spring I quilted the backing to my daughters quilt on upside down, so now I'm going to mark the upper right hand corner and make sure both layers are the right way - duh....


All set for pinning!


I try to come up with a pinning plan and do the whole quilt the same way in each block.  This makes it easier to remove them later, I think. 


It is a good idea to add a few extra where the blocks meet and may shift.  I follow the rule of quilting the grid first, then filling in later.


Release all the binder clips before you close the pins.  This will take stress off the quilt.

This is really important:  Enlist all family member or guests that are hanging about to help you close the pins.  Thanks, honey.


After the center section is finished, shift the whole quit to the other side.  Binder clip the basted edges first, then smooth the layers and binder clip the backing again, and pin as before.  Repeat until all sides are basted.


Here comes the CAUTIONARY portion of this tutorial.  Do as I say, not as I do.

Do you notice anything strange about the bottom of this quilt?  Does it look like the backing will be long enough for top? 


I love being human.  I really do.  It is so funny sometimes.  As I'm preparing this whole thing to blog about, I have somehow miscalculated my backing and I'm short not just on the bottom, but the top as well.


JOY!  RAPTURE!  If I only had a brain.

This has given me such an interesting creative opportunity!  Hope you are having a fun week!

Saturday, January 26, 2013

Cabin Fever - For Real!

Happy Saturday- I'm late for a Fun For Friday and I'm early for a Tuesday post.   I've lost a week due to an unwelcome, unwanted and unappreciated virus.  Perhaps you've heard my cough it has been a "cough heard 'round the world" kind of thing.

Here is my 18 year old UFO Log Cabin quilt top so far:


Look at these striking combinations.  The blocks are 10" square-ish.  There appears to be a heavy trimming hand at work here.


As you can see, it is a everything and the kitchen sink mash up.


I have 35 blocks that still need to be set.  All this just sitting around, moving to 2 different homes, across state lines  and through many US Presidents.  And why?  I think it's the general weirdness of the overall combination of dated fabrics.


Can it be saved?  Should it be saved?

Here is a project I finished before the plague set it.  I think I'll name it "Inauguration Day".  It is made up of patriotic prints.


 The backing is an Americana toile fabric.


It has found a home on our family room dining table.


Stay warm and well and have a great Weekend!


Friday, January 18, 2013

Fun For Friday - Recycle, Upcycle, Re-use......

Call it what you will, I love it.  Here is a project that I did with Rich; homemade Fire Starters.

They say knowing you have a problem is the first step toward recovery.  I am addicted to Yankee Candles.   There, I've said it.


I have been recycling the jars for quite a while and here is how I do it.

I use a knife and remove the scented wax (the recycle for this is coming up below).  I keep them in separate baggies.  I use some as scent tarts, a secondary addition.


I put the jars in the oven at 200 degrees to melt the remaining wax.
 

I wipe the melted wax out using a paper towel, careful; the glass will be hot.


Then I remove the label.  I employ many techniques here:  a knife, a razor blade, goo off - whatever works.


Here is my set up for making the Fire Starters.  The rum on the table was there for making rum balls - I swear!   I purchased aluminum muffin trays so I wouldn't transfer any scent to my regular baking tins.


I used these cute Christmas themed cupcake papers  I couldn't find wicking, so I used a good cotton twine I bought at the hardware store.  The pine cones I picked up on my walks with coco.   The long ones were cut in half.


Rich was the chief alchemist.  We used a large tomato can, which we pinched into a spout.  We put it right on the stove burner on med/low. We did different batches with the same color or scent.


The Fire Starter is:
Paper Cupcake Liners
Pine Cones
Piece of 4 inch Cotton for wick
1/2 inch Melted Scented Wax.
(be sure to let them cool and harden before moving them from the tins)

I used these bread bags that I found at the craft store.  They came with ribbons and round tags.  I was able to use my own address labels - Bonus!
    

Here is our finished gift.  I think with supervision, these would be great to make with kids.  They look cute and smell great sitting by the fireplace.
 

I use my clean candle jars in my sewing room for buttons, pom poms and other fun things.

I did Confess to having an addiction to these.


Thank you so much for all your nice comments about my 4-patch Log Cabin.  It means so much to me to hear from you.

Have a great weekend.


Monday, January 14, 2013

Cabin Fever!!

**Sorry, having problems today with Blogger, hope this posts okay**

Seems to me there is a trend of Log Cabin quilts lately.  I think it is a wonderful, traditional pattern.

Here is my quilt "Little Quilt on the Prairie".  I swapped finished blocks with my buddy Jill.


The backing is this fun vintage print advertising fabric.


The pattern is published in the new issue of Quilt Almanac 2013.


After being away I wanted to come home and sew something.  So I made this little doll quilt.  The logs are 3/4".  I think it would look great as a full sized quilt too.

 
I always think quilting these are a challenge.  I did what I call "Asian water" in the black furrows and diagonal lines in the tan furrows.


The backing is this great print of Mexican beads.


I also experimented with a red and tan combo.


Here is the back.  I quilted it with one large fan.  I'll probably use it for a candle or on my bedside table.


Here is the link to my Cabin Fever Pinterest board.  There are some great quilt ideas there.

On my next quilting post, I'll share with you a log cabin UFO that is nearly 20 years old.  How did that happen?

Thursday, January 10, 2013

Fun For Friday - You're Such a Card!

 Warning:  This may be long and un-fun for some people.  There are, however, a few tips for Christmas Card sending that may be of little value.

Here is our Christmas photo this year.  The finished photo had a caption:  Surviving Sandy 2012.


I nearly didn't do one this year, but how do you stop after 27 years?  Our kids were electronically included in photos taken at their colleges as they kept checking on the power situation.   (note: the occasion was re-created after the hurricane)

Christmas Cards:  fun to do?  probably not; fun to get?  I think so.

I guess that is why I still do it year after year and intend to do as long as I'm around.  I get a card from great uncle who is in his 90s - Bless Him - hand signed.

In my never ending attempt to document things I have a Christmas Journal.  It includes our first Christmas photo, taken on 1985 at a party when we were dating.


 I just found the journal on the right to continue this tradition in our family. 


this is one of my favorite photos of the kids.  Notice the journal part has fallen away, lol.


We announced our big move with NYC themed cards and photo -


Here are my tips:  Put the addresses on the computer.  A template code is included in the package of labels.  Hand writing all those addresses used to be the worst part for me.


As you receive cards, or change of addresses you can go right into the document with the addresses and update.  So easy its almost fun, well I did say almost.


Order festive printed return address labels in January when they are on sale  instead of trying to get them last minute.


When you take your photo to the shop (or order on line) get a coffee mug too.   It's not too expensive and I think they are fun!   I got all of these this year and plan to add a couple a year.  Why, oh why, did I not do this all along?


If you take a photo, consider doing it some time other than between Thanksgiving and Christmas.  Use an event, like Sandy to make it more memorable.  I already have a plan for a summer photo shoot for next years card.

I'm a big fan of the blooper and out-take.  Here are the best of the bloopers my son kept clicking while we were trying to get the shot right.


I'll tell you - that coco is good for a million laughs!
I hope you are off to a Fun New Year!