
Hello Fun Swappers! Here we go!

Basic Information:
- Each Block will finish at 6" (6 1/2" unfinished)
- You will make 1 block for each swapper in your group:
- Repro: 40 Blocks
- Modern: 30 Blocks
Repro Group:
You are using good quality unbleached muslin fabric for the background, and either 1 or 2 reproduction prints for the stars (see the photo above)
Modern Group:
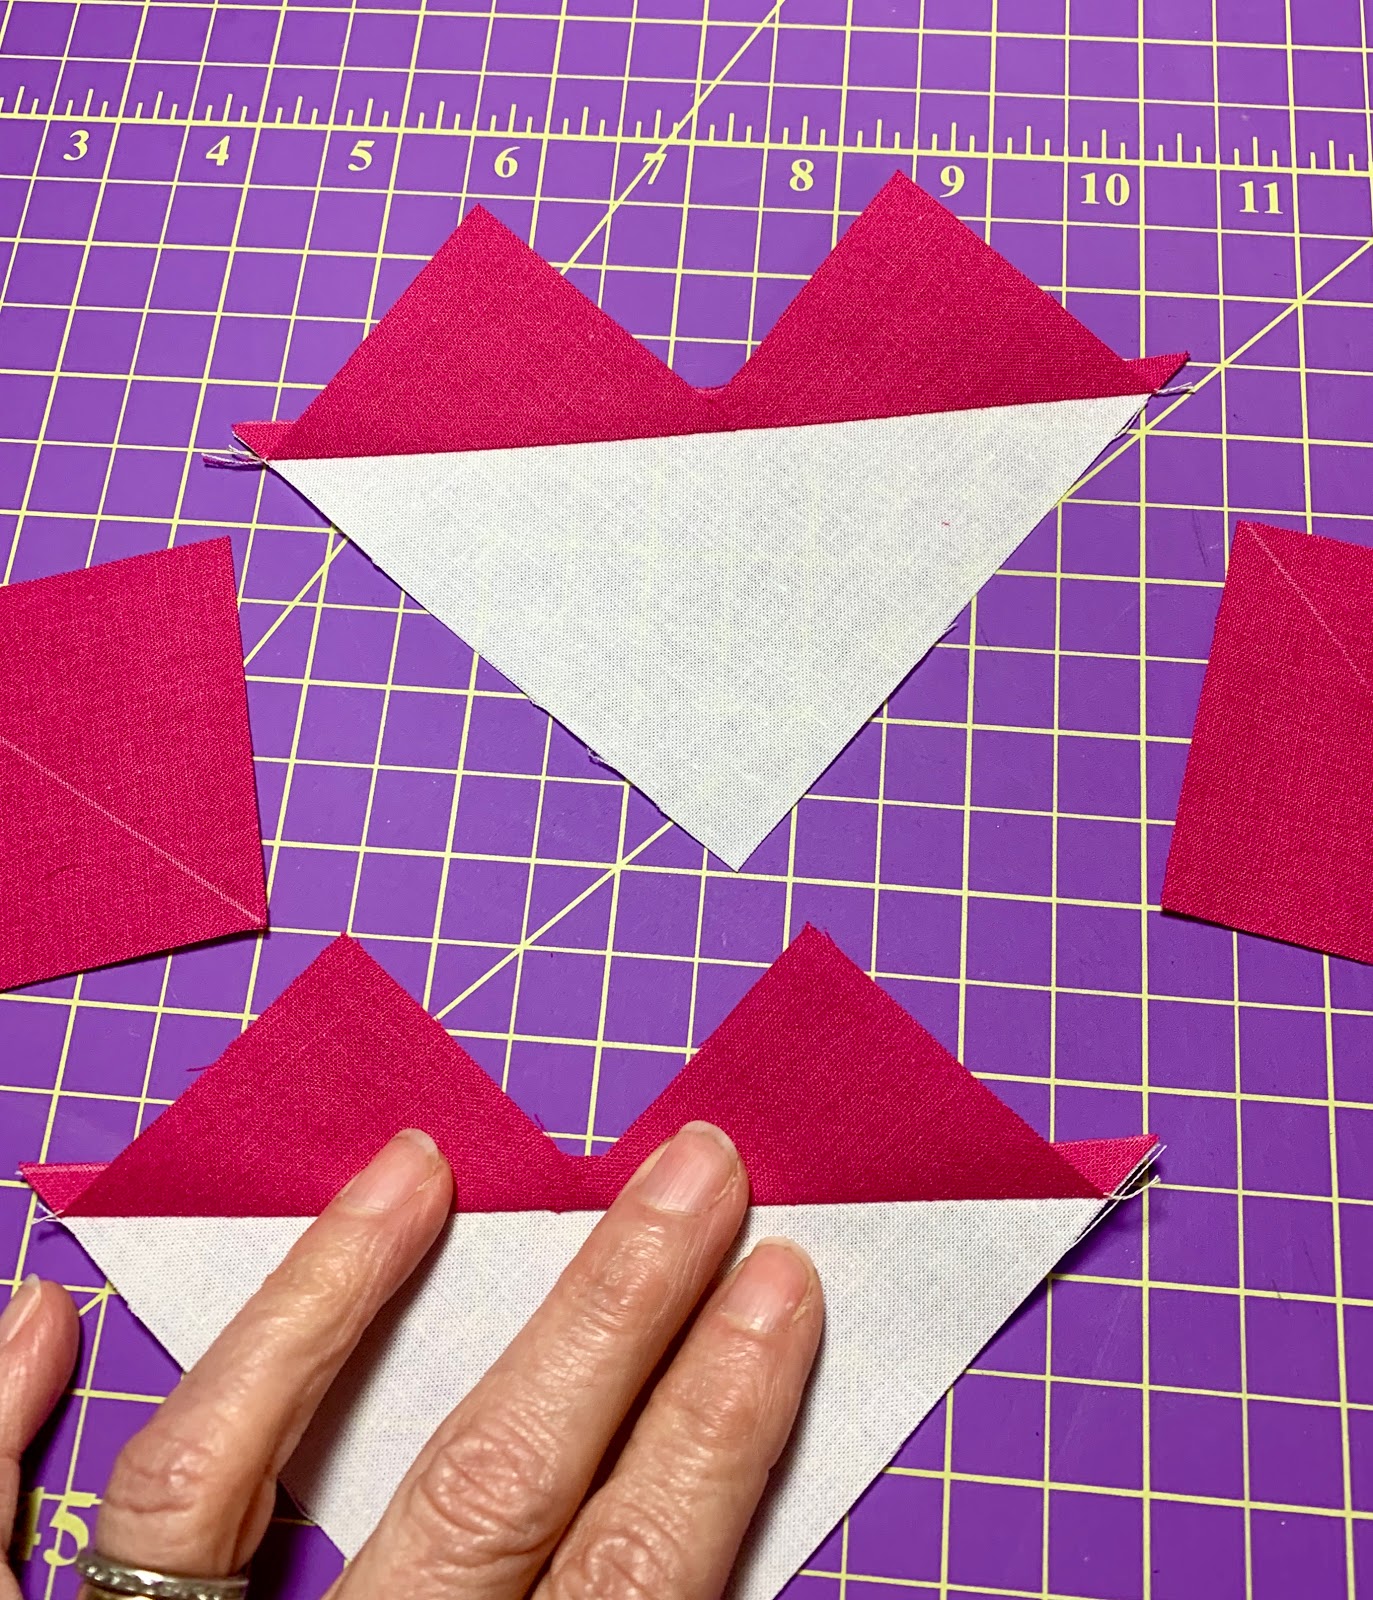
You are using white for background. I like Moda Bella white but any good quality white is fine. (NO tone on tones or grunge) Use a Black and White Print for the center and a solid bright for the star points. (see photo below)
Basic Rules:
- Use Only Good Quality Quilt Shop Fabric
- Use your very best sewing skills
- NO TRIMMING, when you trim you lose points
- Mail them back ON TIME - January 11, 2020

NOTE: I used the modern fabrics for the tutorial, but of course you'll use what every fabrics are called for in your swap group.
Here are the pieces you need to cut for each block:
4 - 2" squares of background (muslin for repro, white for modern)
Here are the pieces you need to cut for each block:
4 - 2" squares of background (muslin for repro, white for modern)

1 - 3 1/2" square for the center

4 - 3 1/2" x 2" Flying Geese Units
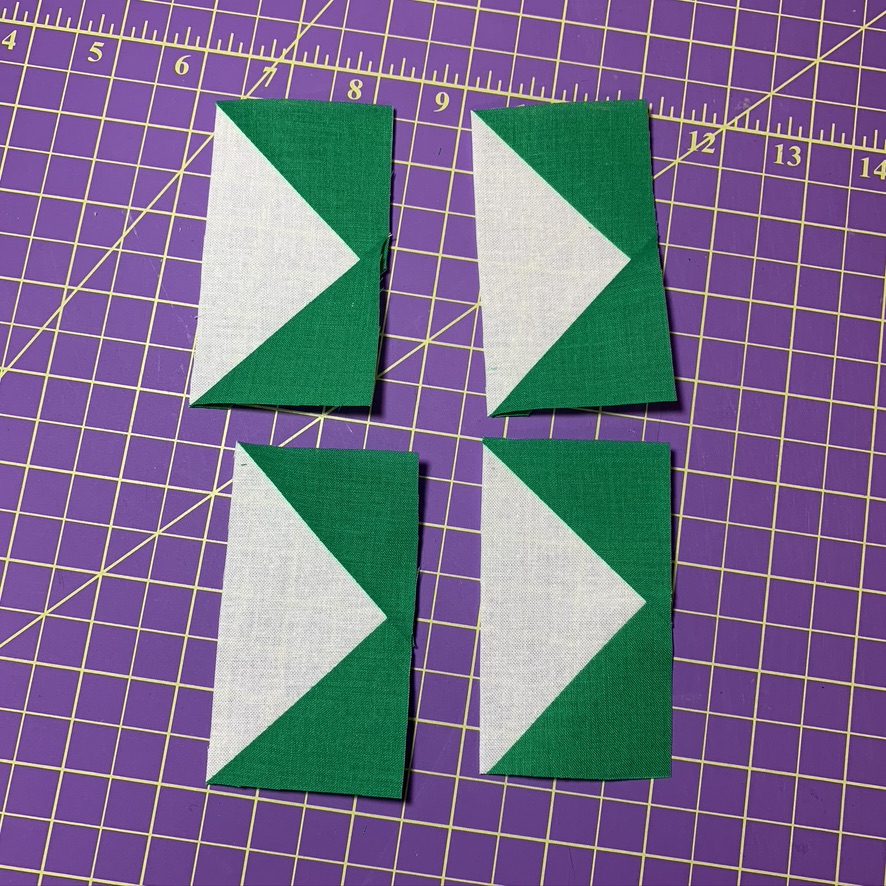
To Make the Flying Geese Units:
(TEST ONE BLOCK FOR SIZE FIRST)!
The cutting instructions are:
4 - 2 3/8" squares for the star point fabric
1 - 4 3/8" Square from the background fabric

Mark diagonal lines on the small squares from corner to corner and lay them (right sides together) on the larger square.
Here I used a simple lead mechanical pencil.

I do at least two sets at a time, more if I have them prepped. If you want to use pins, I pin way to the side so I can't hit them with my needle.
Sew an accurate 1/4" seam away from both sides of the drawn line.


I do like to use a little starch on piecing to keep things nice and straight.


TRIM THE DOG EARS AND DOUBLE CHECK THE SIZE TO BE SURE IT MEASURES 3 1/2" x 2"


4 - 2 1/2" squares for the points
1 - 4 3/8" square for the background

If you use the revised size, you will probably have to trim a little. Please use a good ruler with clear lines and be sure you have a 1/4" seam allowance on this side of the unit. See below↓↓


Layout out the block and sew into 3 horizontal rows.


Join the rows to complete the block

The back will look like this before pressing.

Press the last 2 seams OPEN so the block lays flat.
It will look like this (you can see that I very carefully graded the seam by carefully trimming the green fabric so it won't show through to the front.)


If you have any questions, go back to the top and read all the way through or print out the entire tutorial to use in the sewing room.
If you still have a question, leave a comment here or email me.
Thank you so much for signing up to swap. I have sent an email to all swappers, if you didn't receive one, check your junk mail and spam and email me right away.
Happy Sewing
xo
15 comments:
I love making flying geese this way! I may have missed it, but how many do we make?
Thanks for the tutorial! I have never made flying geese blocks this way- excited to learn a new method. So glad to get these instructions today. I am home on medical leave for a couple more weeks, so wanting to get these made. Again, thanks for another great swap and all that you do!
So exciting... I've already got my fabrics ready to start!
Perfect instructions! Now to get started!
not that this has anything to do with your post today but I was looking at the quilt on your header and I love the spiral pattern you have on it - my question how did you get it so perfect - is there a template for this?
start at the top and read again. ha ha
Got the instructions -- now to select the fabric! Thanks for hosting the swap and for the excellent tutorial, Barb.
Perfect tutorial !!
Thank you so much Barb and... let's go ! :)
Thanks for the great toot! These will be perfect for an upcoming retreat.
I didn't see anything about whether to prewash fabric or not.
Great directions and easy to follow! I am sorry to miss it next year but I will be watching for all those beautiful blocks!
Barb - are the reproductions 30s-style or Civil War? Please let me know as I only have 30s-style in the stash and I don't want to go buy more fabric if I don't have to.
I'm not in the swap, but I appreciate the tutorial. I never thought about pressing those last seams open. Makes sense.
I've found if you can sew a perfect (or scant) 1/4" your original measurements work fine.
That is a wonderful tutorial. You showed each step and then explained a correction that made your measurements work better in the final product. It was nice to see how your "brain" figured out the solution.
I am sorry I missed out on this. It looks like great fun!
Post a Comment