Showing posts with label machine quilting. Show all posts

Thursday, April 26, 2018

Quilty as Charged Pt 2

Hello from almost spring Connecticut!  
 
I have daffodils in my yard but I'm finishing talking about my Christmas Quilt.

My favorite way to machine quilt a liberated quilt is what I have termed: 
Relaxed Crosshatch
 Here are the steps I use:
  1. Spray baste the layers together when working on a small quilt.  
  2. Using a Hera Marker I mark a good 45 degree line across the quilt.
  3. Mark another line at 6"
  4. Mark another line in between - at 3"
  5. Eyeball the line between the 3" lines.  This way I have a little variance but it's not totally wonky - which I have also done.
  6. I really like the look.  What do you think?
Rounded Corners (nice oxymoron)

I picked up this little corner tool and I have to admit I hardly ever use it. lol
 It offers 3 different sizes, but of course none of them suited me, ha ha.
 I used this giant button wall decor instead.  You can use anything round that suits your size needs.
 I used straight binding and just carefully pinned it around the corner right on the line I wanted.
 Easy Peasy.
 In case anyone is wondering, I still make a rag ball of every most quilts I finish with the batting and backing trimmed from the edges.
 Spring bird sightings.  This poor house sparrow is visiting my bird bath which is frozen because I unplugged it - waaaa
A bluebird!  These birds are so shy it is hard to get a photo.
I like this little guys style - he just moved into the window feeder and filled up.  :)
I'm off to The Quilt and Sewing Fest of New Jersey tomorrow.  If you see me, say hello!

xo

Wednesday, May 24, 2017

Preakness to Freakness

We hosted a little horse racing party on Saturday.  I decided to make a hokey cake for the occasion.  It was an exciting race with Cloud Computer stealing it from Classic Empire.
I have been working very hard to finish my son Andrew's quilt.  The backing is finally pieced together.  To be sure everything was the right size, I folded each part into fourths, then layered them.
 When you are making a giant quilt, this is the surest way to avoid mishap.  And Friends, I have run into trouble on several occasions.
I pinned the center of each layer.
 I cover my kitchen table with old cutting mats to protect the crappy finish (ha ha) and get my binder clips and pins out.
I store pins in the open and sprinkle them on the lids and across the quilt - it's works for me.
 I match up the pins when I layer it on the table and in this way know that everything will line up on center.
I marked straight lines 1 1/2" apart.  I like Crayola WASHABLE markers but I always toss out the yellow marker as it is harder to remove.  Also, you have to use Clorox2 when you wash per manufacturer's instructions.
Next I pinned - and I mean PINNED!  I have found that it is really works well for me to use a lot of pins.
Finally... I'm ready to roll.  Wednesday, I quilted for 7 hours with a few breaks.
Okay - here is the Freakness part of the post: We're watching this at my house.
It is confusing, violent, provocative, disturbing.....we love it.  I am listening to a podcast to help me understand what is happening.

While machine quilting, I binge watched this on Netflix.   It is also a bit disturbing, but also fascinating.
To leave you on a upbeat, is this not the funniest card - ever?
It made me belly laugh out loud.  Have a great week and I'll share more on how I'm quilting this king sized quilt.

xo

Wednesday, March 2, 2016

Redemption - Sumptuous Stars!!

The Stars are finally shining brightly!!

Introducing:  
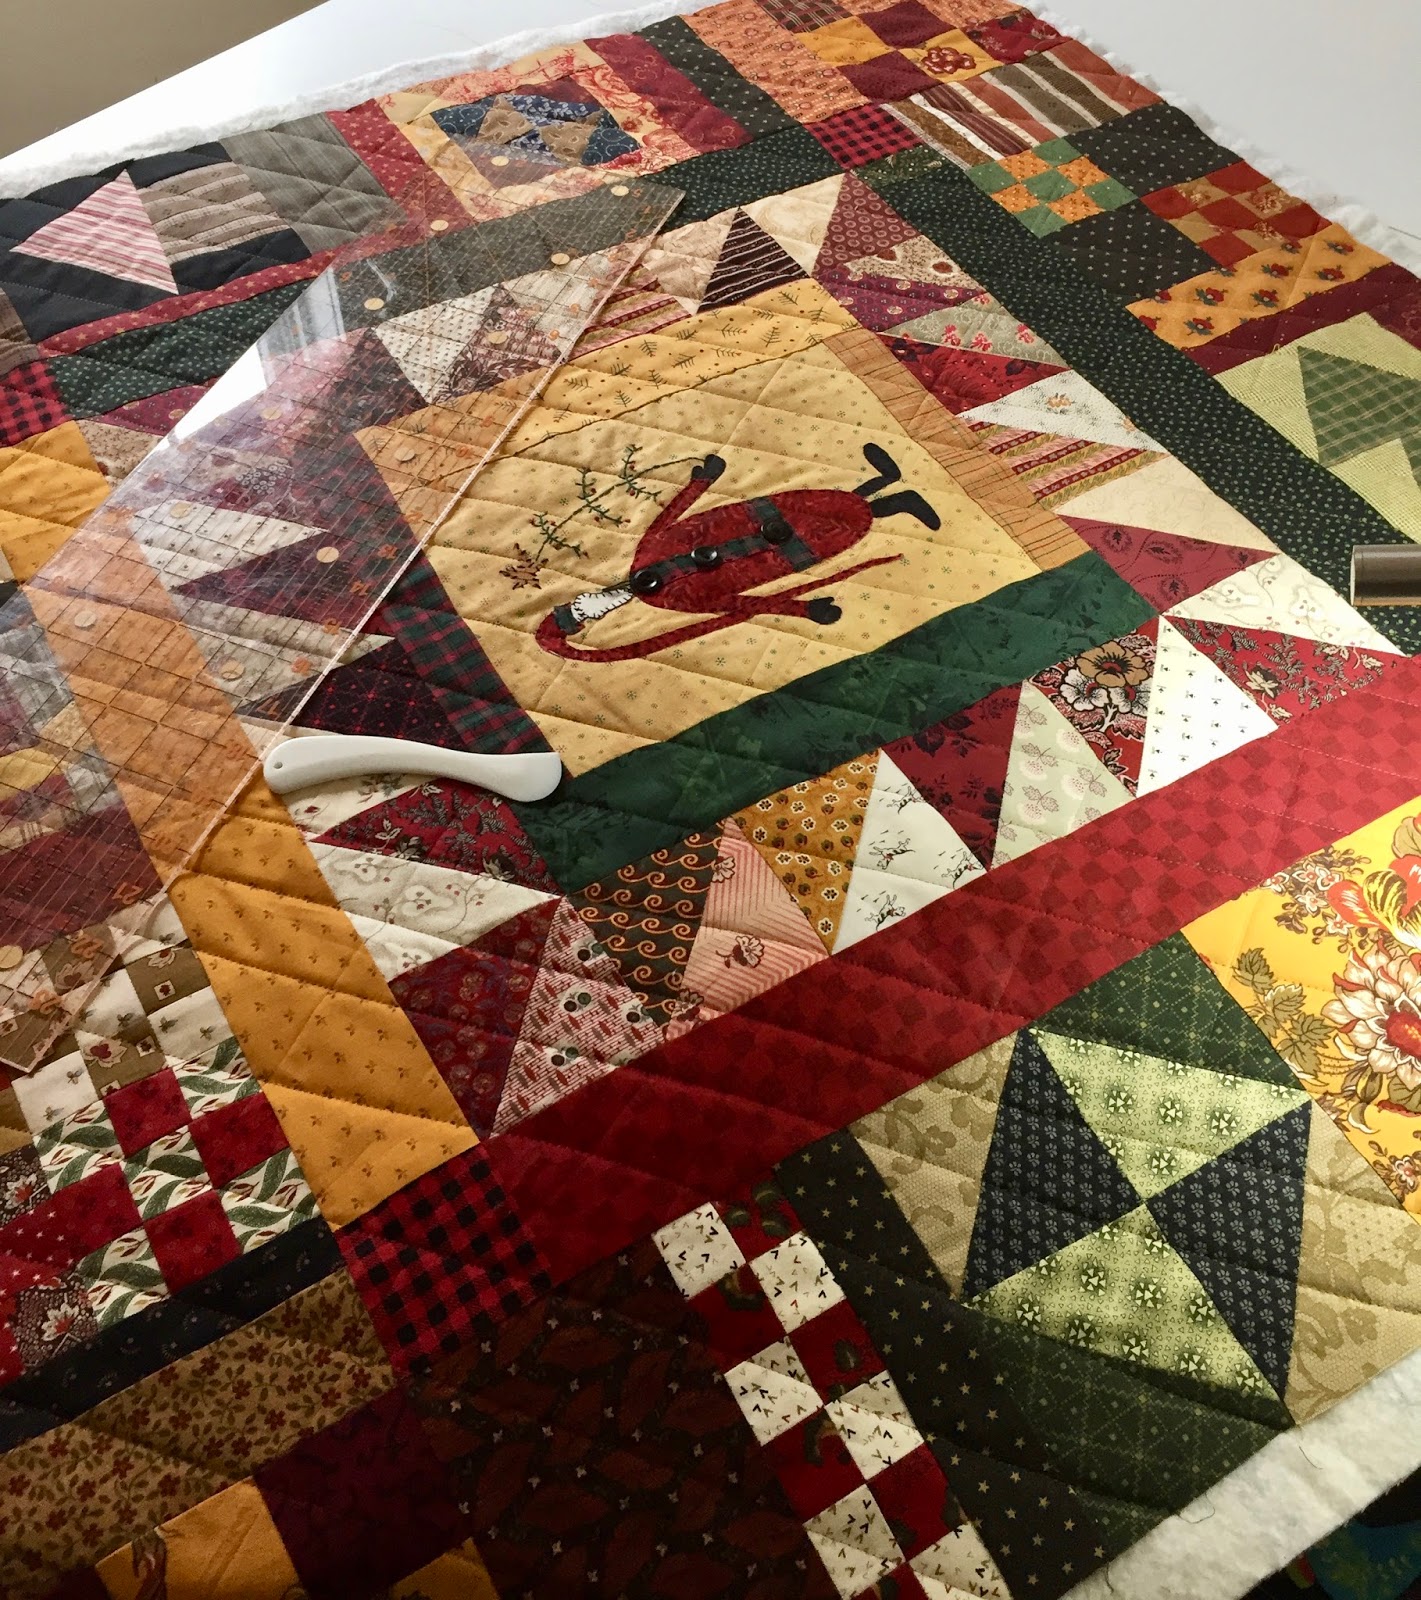
Sumptuous Stars 80" x 80".  (sorry these are iphone photos)
A behind the scenes view of how I attached it to the railing, ala Home Depot.  No quilt was injured in this photo shoot.
After I pieced the blocks in 2012 I saw this antique quilt in an engagement calendar and bingo!  it was just the right inspiration.  I can not believe how similar they are.
I first posted the finished top late summer of 2012 in NJ.  That was the summer Mr. Fun lost his position in NYC- which is one reason this got shelved.
During the recarpeting of our entire upstairs in spring of 2014, I put this quilt along with lots of other things in a bathtub to get it all up off the floor and out of the way.

NEVER, I repeat NEVER put anything valuable in a bathtub besides people.  Somehow it got a little damp and some color ran.  I spot cleaned it with oxyclean but I had all the markings on it from the  Crayola Markers so I couldn't really soak it.
I decided I had to pin it and get it done.  After pinning about half of the quilt I realized I was short on 2 sides.   Seriously......seriously?   out came those pins and it was re-shelved.....again.

Here is an after shot of that area and it seems to have come out.  Not my finest stop in the machine quilting - oh well the other two look good.
Here are the products I used along with regular detergent.  You MUST use safe all color bleach to remove the washable markers according to Crayola's instructions.
 I used 10 color grabbers.  Norma and discussed it yesterday and we did wonder if it would have all just gone down the drain anyway.  Better safe than sorry.
Here I'll cut away for an action shot of binding.  I hold it this way to stitch - how do you??
Here is my label.  I pinked the edges this time and just sewed it on.  On is good.
So I re-pinned the quilt in early February and started quilting on Friday, February 19th and finished the machine quilting in a week.  The binding took about 3 days to apply and stitch down.

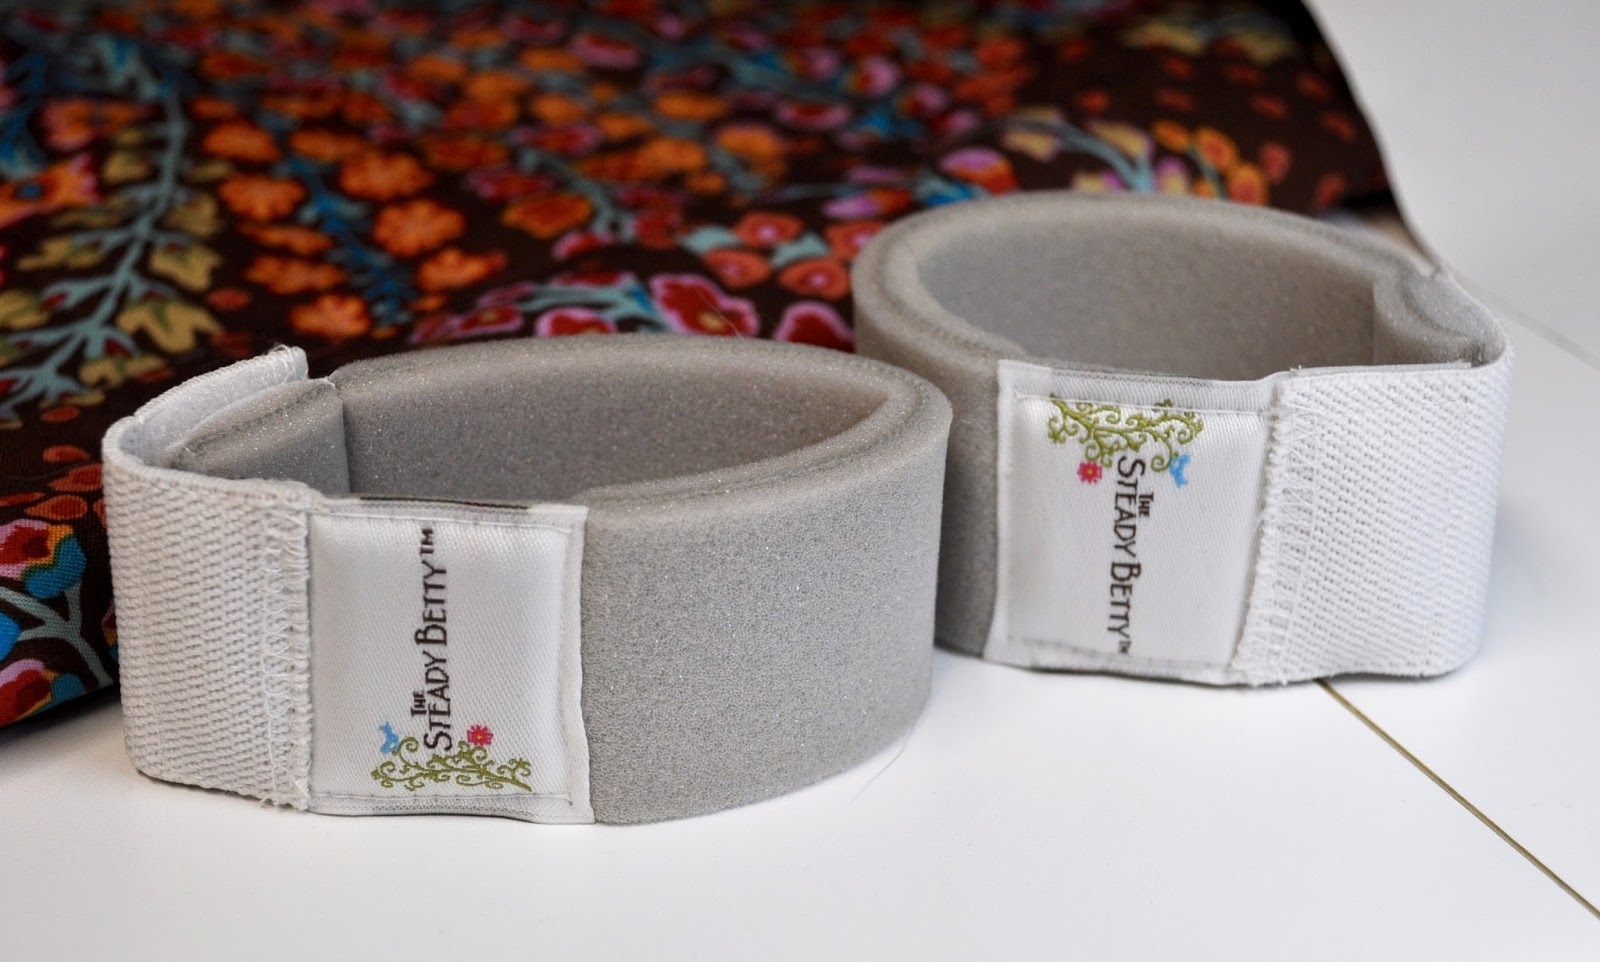
In my last post I forgot to mention that I like to use the Super Slider on my sewing surface.  I keep it on all the time now.   It helps the fabric move along and reduces shoulder fatigue.
This was neat trick I accidentally learned.   If you line up striped bias strips like this~  (note how the stripes are lined up on the edges)
It comes out really great - like this!  I made 328 inches of bias for the edge of this baby.  Easy Peasy.
After trying out several I thought this was an interesting binding fabric choice.  What do you think?  
Here the back where I used this fun Kaffe fabric.  You can definitely see where the seam is on this one but I kind of like the way it looks.
 Argh....this is where I had to add fabric to the side
and bottom
Are you still here? - oh my this getting so long - sorry.  Here is a fun shot from my staircase.  It is really a big quilt.
Here are a few last minute things that I posted on instagram.
Our golf group learned how to curl - always wanted to try it!  Challenging and fun.
I spent Tuesday morning sorting out sweet coco's ear infections.  Poor pup, double ear infection.  Both yeast and bacteria, what an overachiever!
I hope you are having a good week.  I'll be back soon with a Westering Women and Alice Payne update.
xo

Wednesday, February 24, 2016

doll quilt, stars and birds, oh my!

I've been staying home lately and very keeping busy.  Winter is so good for that.

First up:  A Little Doll Quilt for Diane.  (Kelly - recognise the shoofly?)

Here's the pieced back.  I "made do" with scraps of this because I knew Diane would like it.  I also like that it makes it look like a full sized quilt.
I tea dyed it to make it look vintagy and older.
Here is the before shot.  The blues are a brighter and the shirtings lighter.

Here we Sew Again - I re-pinned this quilt for machine quilting.  I started this project in 2011.  Can you believe that?  It has a long, sad story that I hope ends in redemption.
Here are the steps I take to get ready to machine quilt:

I move my ironing board to support the quilt weight.
I always start with a fresh needle.  I consult this sheet from a magazine that I keep in my thread drawer (it only took me 20 years to do this :)
Get my top and bottom thread picked out and spin some bobbins.
Clean my bobbin well really well.
I also like to use these Steady Betty bands that Susan gave me.  They help move the quilt without hurting your shoulders.  I only use the left one, and I grab with my right hand.
After having some slipping issues, I altered them to fit my hand better.  
Action shot.
I'm normally not a timer, but I thought I'd see how long it takes to quilt one fan.  They have 10 arc lines each.  Time included all starts, stops, clipping and unpinning.  Not bad!
Here is the size of a fan section.
All those starts and stops makes for lots of thread trims!  This is my second batch.  I think I'll toss this in the woods, maybe a bird with use it for nesting material.  Did I say birds?
Bird Alerts!
I saw a Raven in the yard a couple of weeks ago.  They are amazing.  I saw it swoop over the yard and pick up a snack and take it back to the branch to eat.  Yikes.
Do you see what I see?  I saw this flash in the woods and grabbed the binoculars and camera.  (boy was it dreary yesterday)
Pileated Woodpecker! (better photos on the link)   We played peek-a-boo.  This is only the second sighting of him.

He is moves very fast around a tree, then it is on to the next.  I moved from room to room to keep watching until he was gone.  These photos are with my highest zoom then enlarged on the computer so aren't great.
Today is Westering Women day!  I'm off to see it and I'll be posting my 2nd block on IG #westeringwomen and #westeringwomensewalong.   I'm also going to be posting the blocks of 2 Illinois friends here soon.

xo