of fan quilting!
As you all know, I designed and manufactured a large fan stencil because I couldn't find one on the market that was the large size I wanted. I made my own for this quilt.
I was asked by my friend, Sheila, to do a tutorial on how to mark a quilt with this stencil.
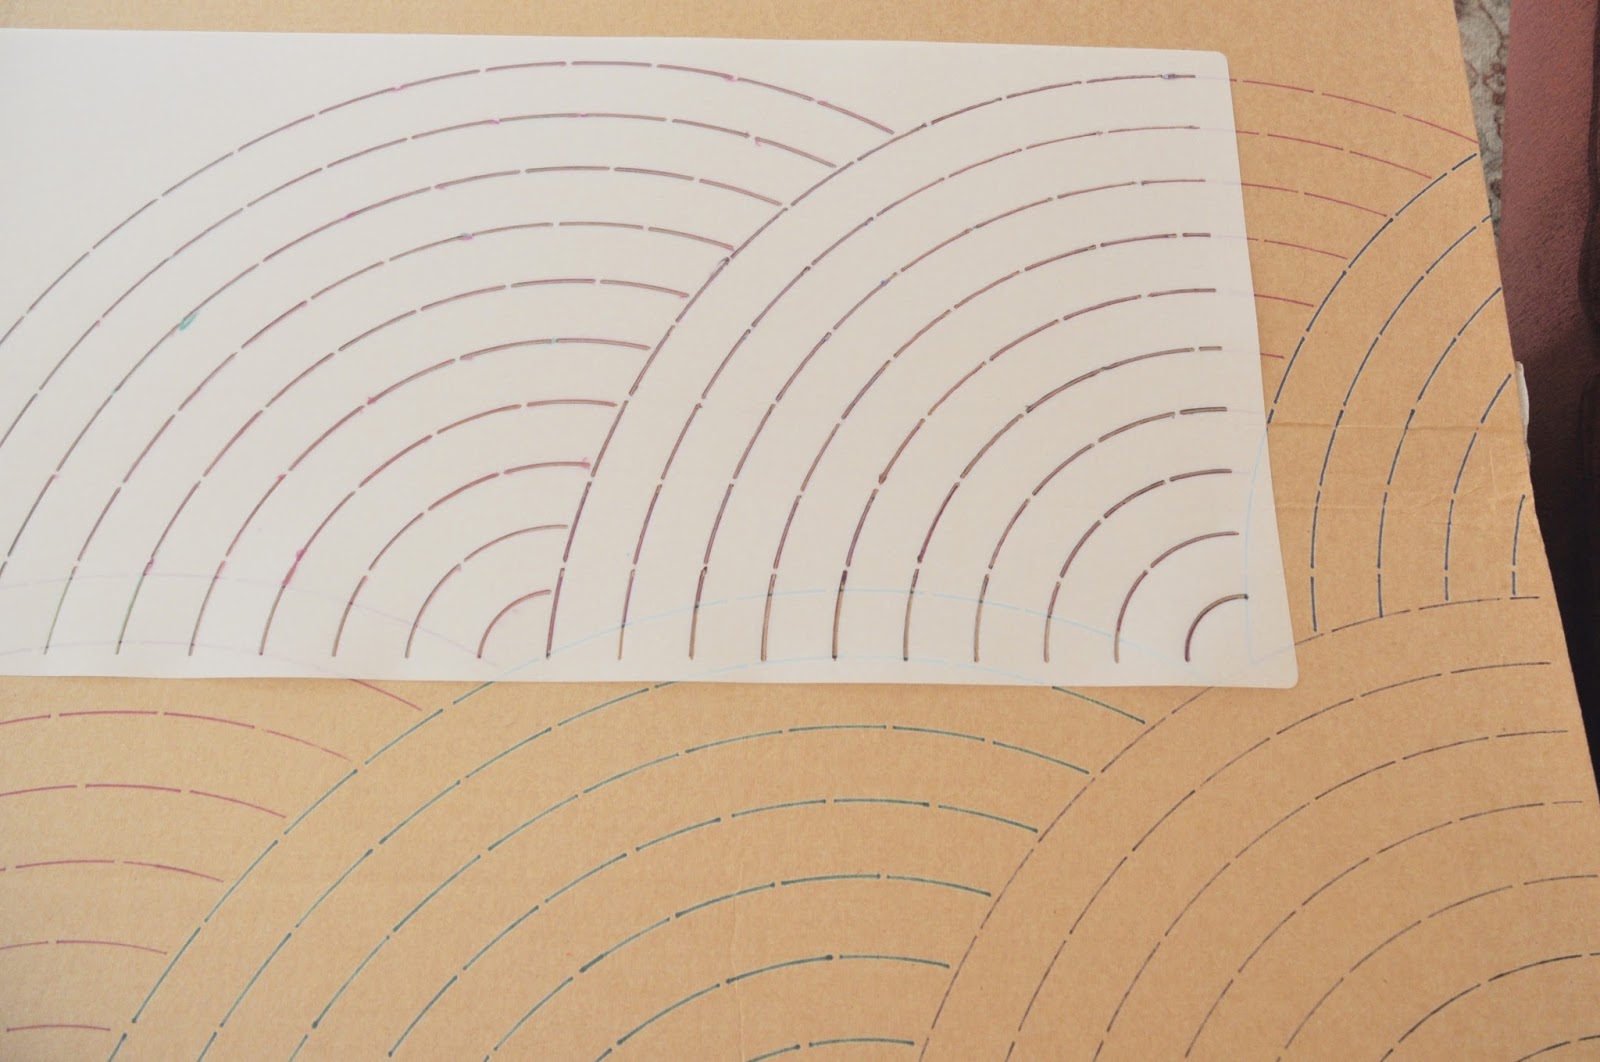
Let's pretend this cardboard is a wonderful quilt top.
I line up the stencil with the bottom and right side.
I mark the first section, then the second section.
Here is how it should look.
Then I move on to the third fan, lining up the first section of the stencil with the already marked whole fan.
And viola'
Now I move up to the next row. I line up the little quarter circle where the previous rows' fan meets.
See how the stencil now dips into the previous fans? You'll want to take care to end your marking lines where the fan below is. I highly recommend that you mark the bottom while you are noticing. It is very easy to forget and mark past the previous fan - Sheila ;)
Once that fan is marked, move the stencil over and add the next fan.
Keep moving along right to left and bottom to top. Of course you can mark them any way you wish, but this is a good basic fan placement design.
Here is how it looks when you are finished.
I used different sharpie markers to make this tutorial.
I did big stitch quilting on my "Won't you be my Neighbor" quilt.
Here is a photo that I found of an old quilt. The fans are colliding in the middle after being started on opposite sides of the quilt. I would like to do one this way!
I offer my stencil at my Etsy shop, see button on the right sidebar. Do you think this was helpful? I think I'll make a page tab at the top for easy reference.
Happy Quilting!


33 comments:
Thanks for a great tutorial, Barb! I'm looking forward to the swap.
Great tutorial. I have your fan stencil, now I just have to use it!
Thanks Barb for a great explanation of how to line up those fans. Love the way fan quilting looks on a quilt!
I am a big fan of you being a fan of fan quilting! Wonderful tutorial........and............where may one purchase said stencil?
Thanks for the tutorial, Barb. I'm a fan of fans, too, but I've only ever done them free-hand, which is to say, they are not perfect fans.
Your quilts are beautiful. I especially like the yellow one. And those 16 bowties, too.
You pointed out on the antique quilt that the fans start on opposite sides and go in different directions. I realized not too long ago that the quilts that are quilted like that were probably done at a quilting bee, with ladies sitting on opposite sides of the frame quilting right to left. That's just a guess, of course.
Wonderful tutorial. I could never figure out how they should go. BTW .... be sure to clean your template with rubbing alcohol or nail polish remover to remove any Sharpie residue because when next time you use your template with a washable marker, your marker will actually pick up the Sharpie stuff and it will transfer permanently onto your quilt top. Guess how I know this!
Yes, great tutorial! I have the stencil, but haven't used it yet. Very helpful!
Wow, you are so subtle with your hints that I have no idea what kind of swap you are planning. : )
Amazing timing for your post - I was just pondering how to start marking the fan on a quilt, and voila here it is! Thanks so much, Barb. Looking forward to info on the block exchange. Love bow tie blocks very much!
Thanks for the great tutorial, it makes perfect sense. Do you have any tips for keeping the stencil running straight across the quilt, or maybe it isn't an issue.
Thanks for showing it on different quilts with different types of quilting. It looks great no matter how you quilt it.
Thanks, Barb! I have a small fan stencil that I've never used. Now I think I can give it a try. Always admired the beautiful fan quilting on your quilts :)
Thanks for the tutorial and the handy tab at the top. I also really liked your little video on machine quilting the fan--that could go in your tab too! I've voted yes to the bow tie swap because the 9-patch swap was so fun, even though I still only look and ponder at those blocks.
Your tutorial is very clear. Love the Baptist Fan quilting design- my favorite. Will search your blog for the video mentioned above- I missed it.
Great job Barb. You have become quite the expert on this subject. I like the idea of different colors. Very cool.
thanks Nancy - I'm sure you are right! I've done free hand fans too and love them.
Thank you!! I've got your wonderful large stencil, but I was stuck on the marking. I'm going to use it with a white quilt. What marker do you use on light fabric? Oh, bow ties! I love bow ties!! Is it too late to join the swap?
Wonderful tutorial - I love the baptist fan pattern in quilts!
I will definitely have to invest in your stencil!
I'm wondering how you quilt baptist fans by machine. Do you do it with the FMQ foot and then backtrack along previously stitched lines to get to the next line of stitching? I think it would be hard to do with the walking foot because of having to turn the quilt a lot. I'm thinking about quilting these on a large quilt. I have only done it by machine once and did it by FMQ. Some of it is kind of wiggly. But it doesn't show much because it's mostly dark, busy reproduction fabrics. Any ideas would be welcome. And, I will participate in the block exchange!!
Great tutorial and I have the same question as Ruth. Is there a way to do it on the machine?
I love the look of fans and can't wait for the swap!
Love getting to see your beautiful quilts again! The Baptist Fan pattern is one of my favorites.:)
Good tutorial, thanks for sharing. I haven't used the fan quilt stencil yet, but then again, I haven't hand quilted anything in a long while. I think it's time to choose quilt top from the pile and start hand stitching!
Very good tutorial! Thank you! Loved seeing your quilts too!
My favorite quilting motif! I never really knew how to line it up, (Obviously it didn't worry me) but now I do!
Ohhhh I didn't receive your newsletter ! Grrrrr.....
Thank you so much for this wonderful tuto ! I love this kind of quilting !!
Woop woop for the swap ! I have a little idea ...... 😊
Xoxo
A bowtie swap! So Fun! I love fan quilting too. I would love to try your double fan stencil but don't have a suitable quilt to use it yet.
What a great tutorial, and it's a treat to see some of the quilts you've quilted using your giant fans. I've been trying to guess which blocks you'd choose for the swap, I didn't guess bow ties but what a great block, it'll be such fun to see a wave of bow ties turn up everywhere.
Barb: I absolutely LOVE the folk art quilt in the first photo. Just lovely. I think this is one that will be treasured generations into the future!
Wow! Terrific tutorial, Barb! Marking stencils can be quite intimidating but you actually made it look doable! Thank you!
Ooooh, thank you Barb - very helpful in knowing how you place the second row! I LOVE my stencils that I purchased from you!
Your fan marking tutorial is perfection! Thank you so much for sharing this!! By the way - belated congratulations on having quilts juried into Quilt Expo - Madison. Was supposed to go last week but life got in the way and so sorry I missed it - would love to have seen your entries.
It was awesome meeting you at my Guild meeting in New York. Thank you for the fab stencil I had been looking for something like this for a few years. I am a big stitcher and the smaller stencils for the same price did not work for me. I am designing my first queen size whole cloth quilt with fabric I purchased in Africa when I was there participating in a quilting exhibition. I will be sharing your information in my online groups. I am sure there are other handquilters who can use your product. Thanks again.
Dee
Sister Quilters
When marking a quilt for hand quilting the baptist fan, would you mark the entire quilt first, or would you mark one row, hand quilt it, and then mark the next row? And what is your favorite marking pen for this? Thank you.
Kathleen - kakingsbury at verizon dot net
I just received my fan stencil from your Etsy Shop, this tutorial was helpful! Thank you
I am using your stencil and loving it! I was always afraid to try the Baptist fan but you made it easy!
Post a Comment